Make sure you have gone through the section before continuing.
Prerequisites
installed and running
(optional) Use as an alternative to Docker Desktop
Node & or npx installed
account for publishing images
API key
Installation
Install globally or use npxor bunx in this tutorial we will use npxto call the Phala Cloud CLI.
# Skip build install globally
npm install -g phala
# use npx phala
npx phala
# or use bunx
bunx phala
Sign Up for an Account
Run npx phala freeto get started with your Phala Cloud account and a free CVM deployment.
npx phala free
This will open a browser to the Phala Cloud sign-up page. Get your free account then get started on generating your Phala Cloud API Key.
Generate a Phala Cloud API Key
Log into your dashboard and select the logo in the top left corner.
Click your username and select "API Tokens".
Click Create Token and then copy your newly generated API Key.
With your API Key in hand, authenticate your CLI:
npx phala auth login
When prompted, paste your API Key. The CLI will confirm successful authentication.
phala auth login
✔ Enter your API key: … ************************************************
✓ Welcome hashwarlock! API key validated and saved successfully
ℹ Open in Web UI at https://cloud.phala.network/dashboard/
Congratulations! You've now set up the Phala Cloud CLI and authenticated your account. You're ready to start deploying and managing confidential applications on Phala Cloud.
Remember, you can always check your authentication status with:
npx phala auth logout
# ✓ API key removed successfully.
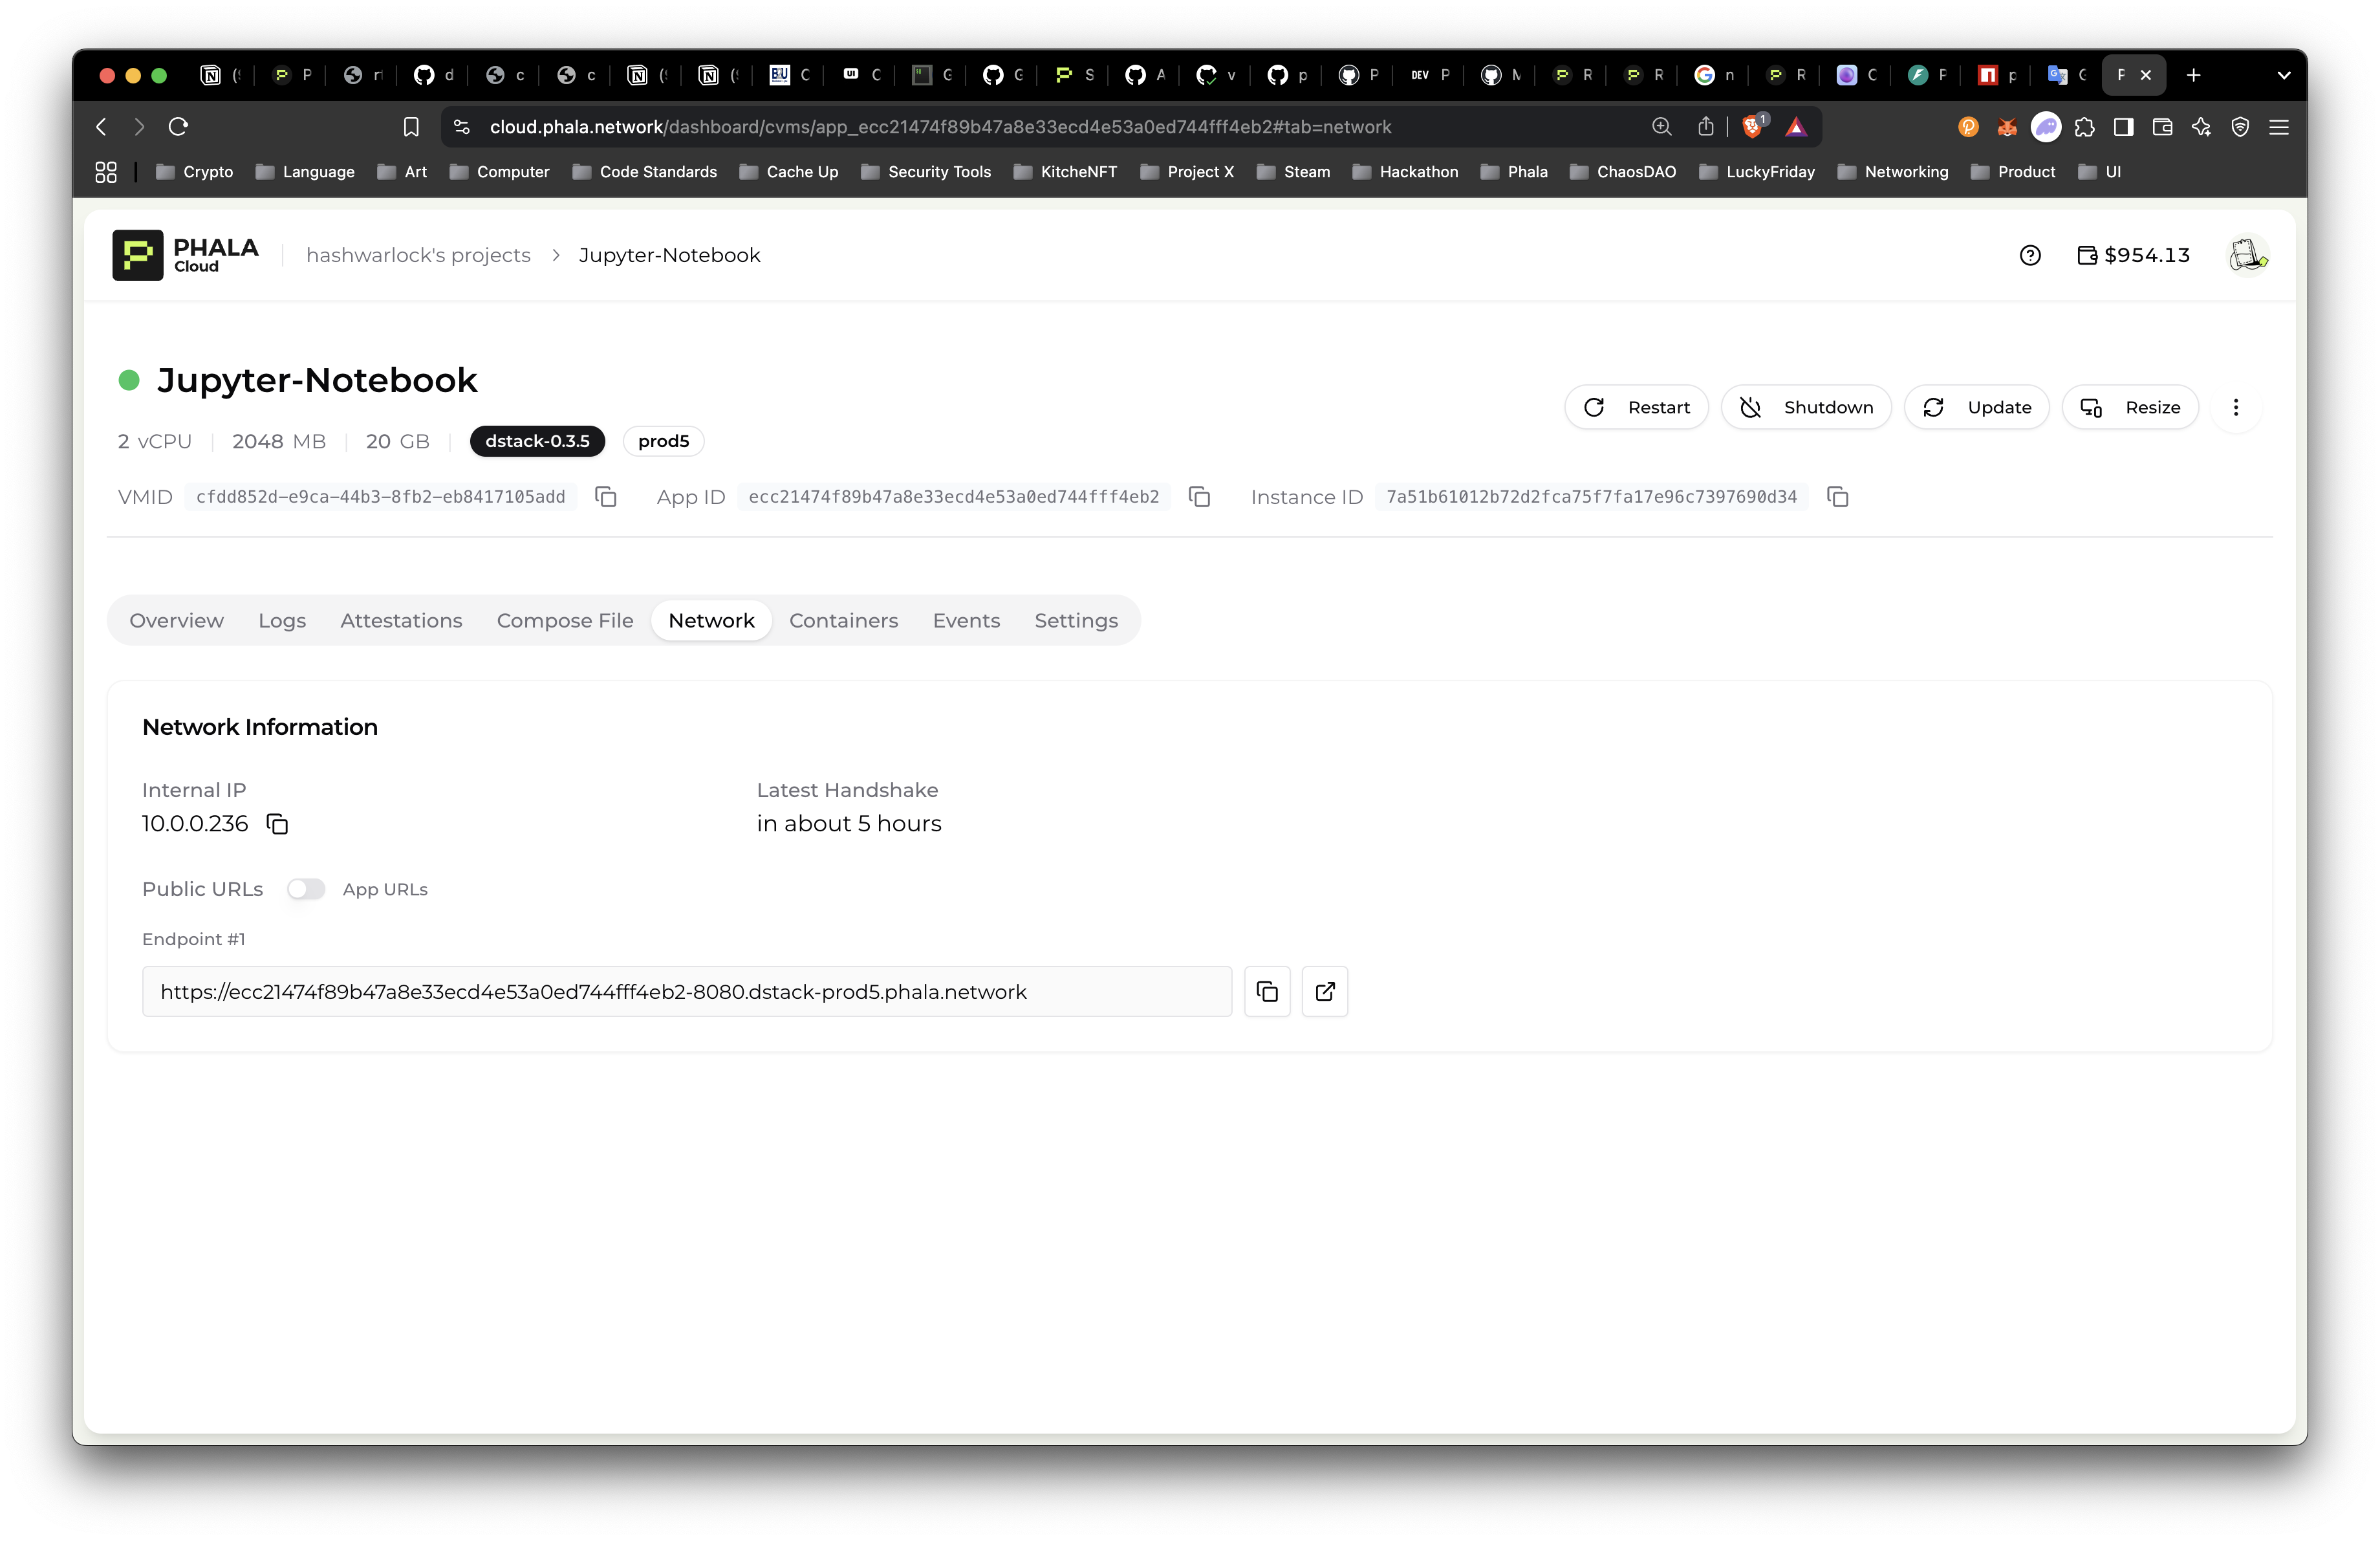
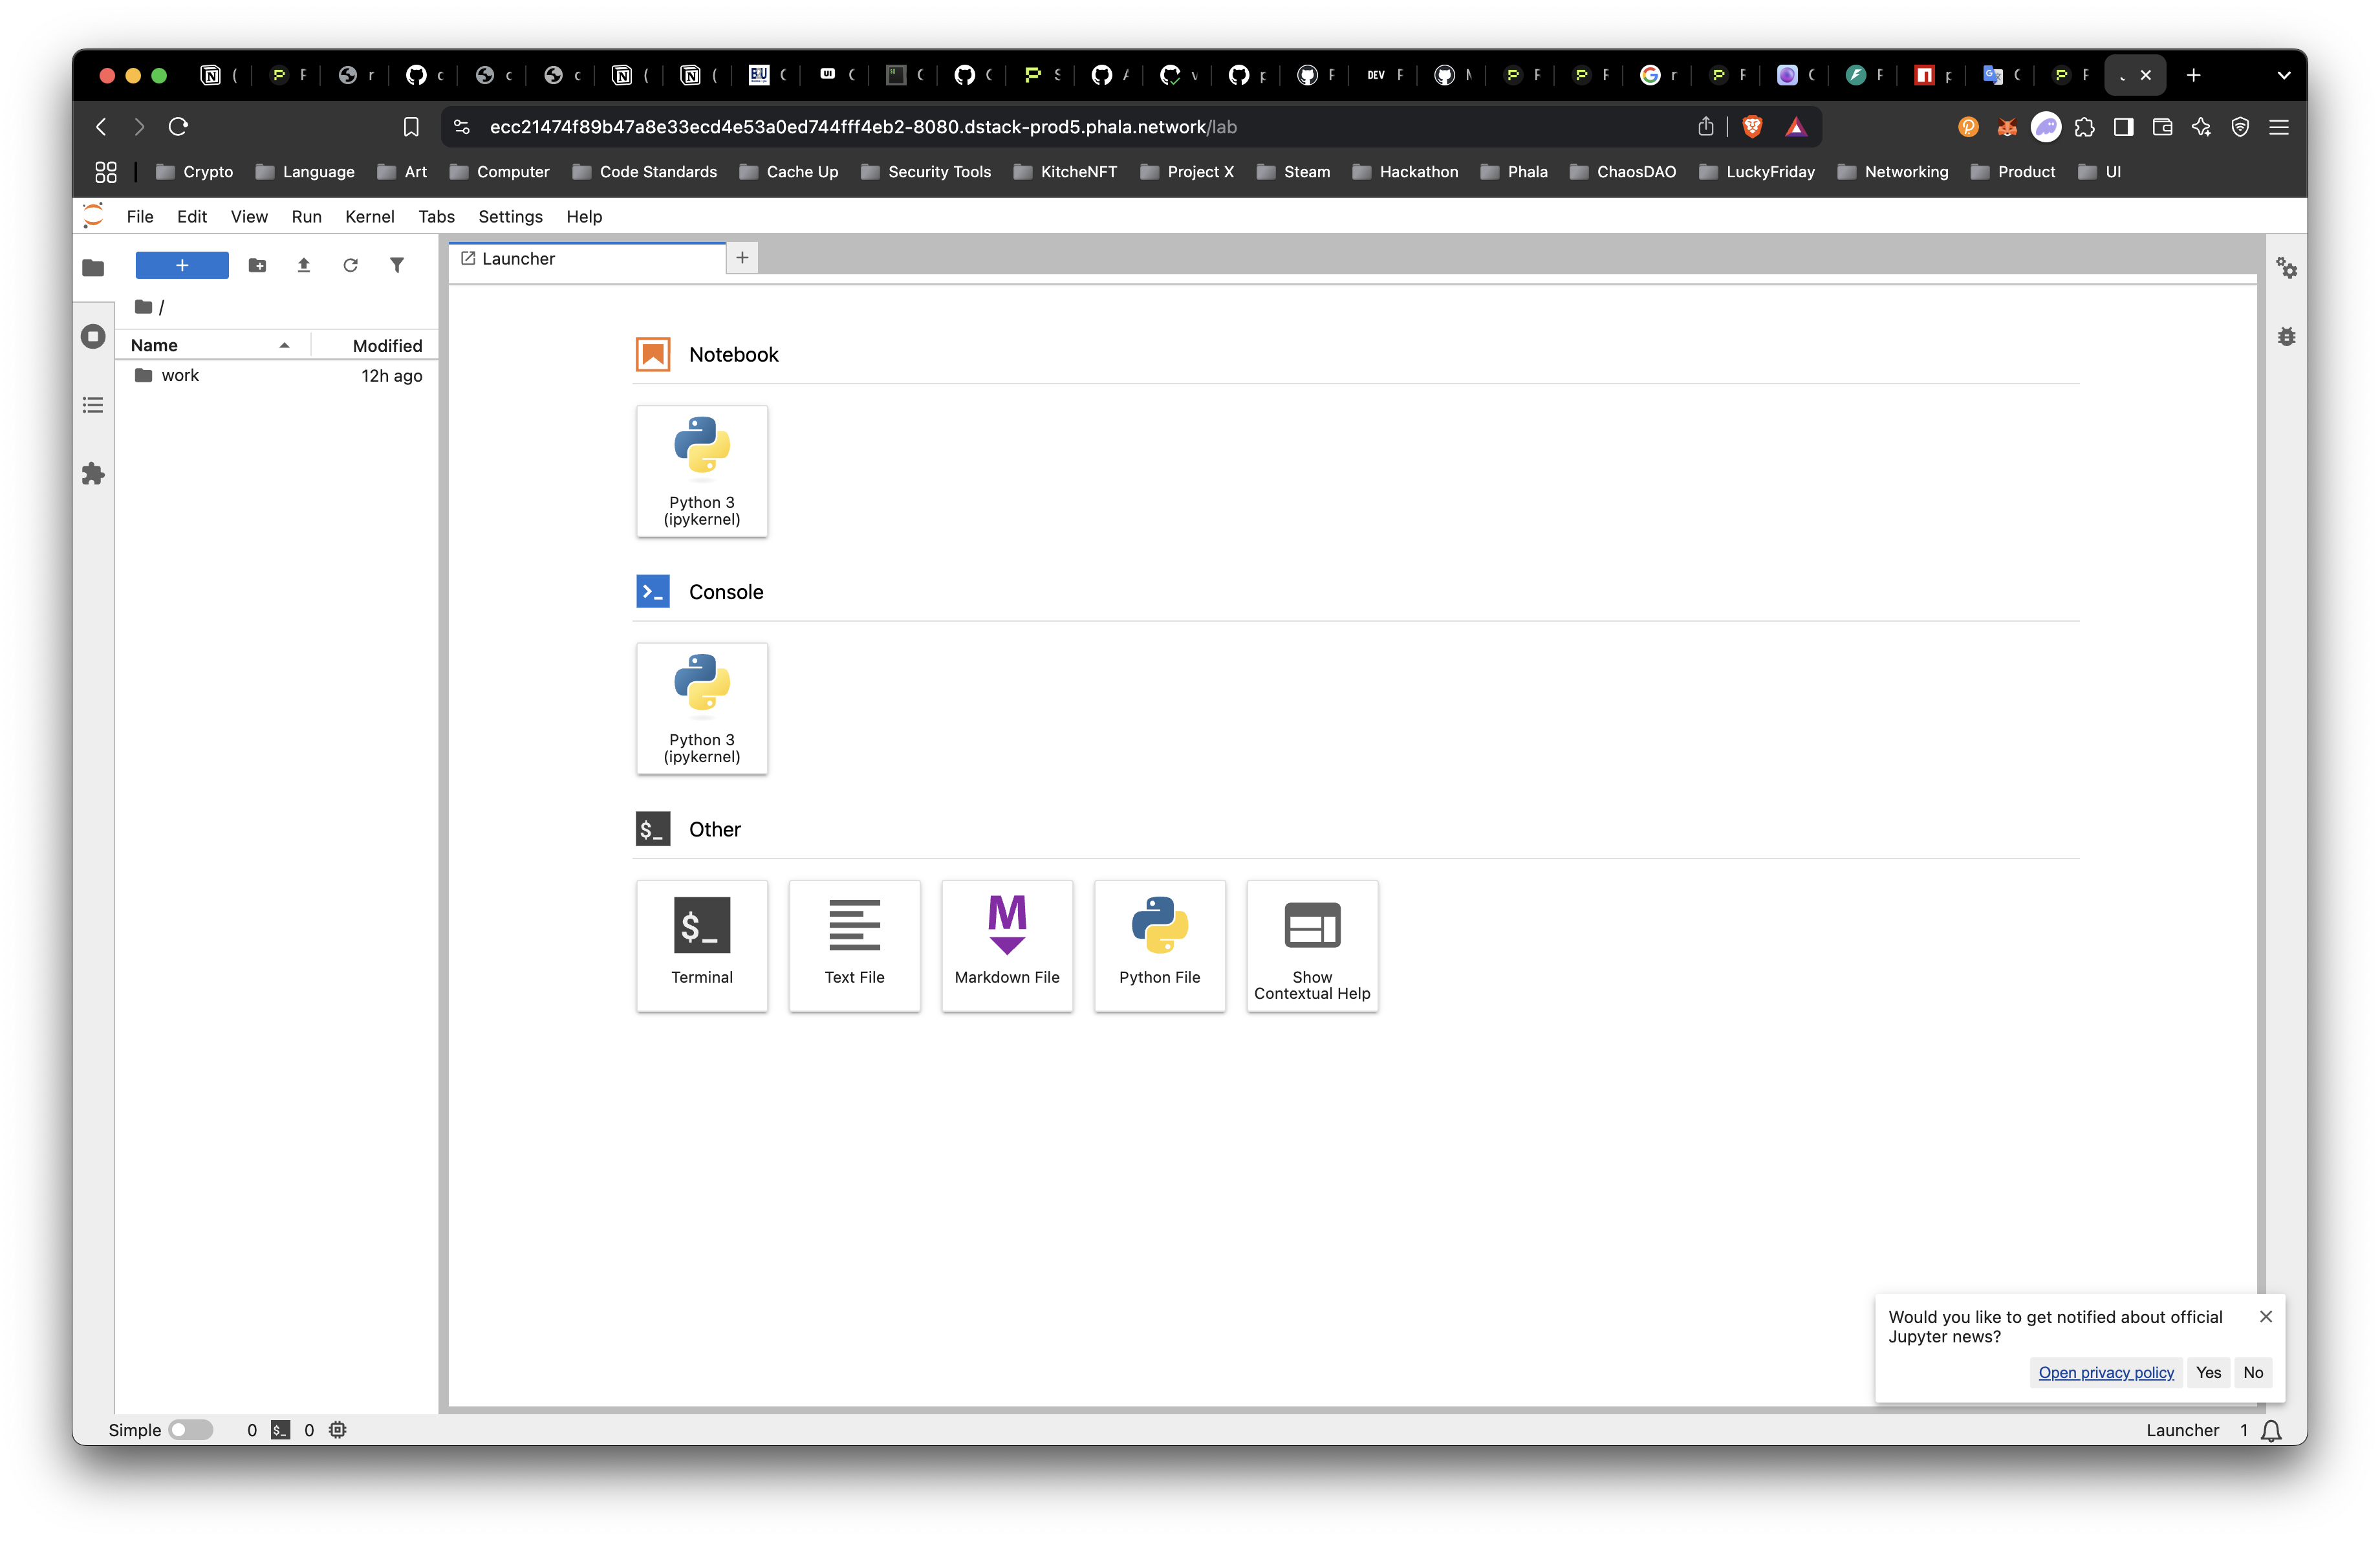
Launch a Juptyer Notebook in CVM
Now that we are authenticated to our Phala Cloud account with our API Key, let's deploy our first CVM
The process is easy as we have setup a demo command for you to try this out quickly.
phala demo
You’ll have a list of demos to test, and we will try the Jupyter Notebook demo. This part of the guide is very simple. Run the command, sit back and watch the magic unfold.
phala demo
⟳ Verifying your credentials... ✓
✓ Logged in as hashwarlock
✔ Select a template to deploy: Jupyter Notebook
✓ Selected template: Jupyter Notebook
✔ Enter a name for your CVM: Jupyter-Notebook
ℹ Preparing to deploy your CVM...
⟳ Preparing CVM configuration... ✓
⟳ Creating your demo CVM... ✓
✓ Demo CVM created successfully! 🎉
╭─────────────────────┬───────────────────────────────────────────────────────────────────────────────────────────────────╮
├─────────────────────┼───────────────────────────────────────────────────────────────────────────────────────────────────┤
│ CVM ID │ 3751 │
├─────────────────────┼───────────────────────────────────────────────────────────────────────────────────────────────────┤
│ Name │ Jupyter-Notebook │
├─────────────────────┼───────────────────────────────────────────────────────────────────────────────────────────────────┤
│ Status │ creating │
├─────────────────────┼───────────────────────────────────────────────────────────────────────────────────────────────────┤
│ App ID │ app_ecc21474f89b47a8e33ecd4e53a0ed744fff4eb2 │
├─────────────────────┼───────────────────────────────────────────────────────────────────────────────────────────────────┤
│ App URL │ https://cloud.phala.network/dashboard/cvms/app_ecc21474f89b47a8e33ecd4e53a0ed744fff4eb2 │
├─────────────────────┼───────────────────────────────────────────────────────────────────────────────────────────────────┤
│ Template │ Jupyter Notebook │
├─────────────────────┼───────────────────────────────────────────────────────────────────────────────────────────────────┤
│ Resources │ 2 vCPUs, 2GB RAM, 20GB Storage │
├─────────────────────┼───────────────────────────────────────────────────────────────────────────────────────────────────┤
│ Jupyter Token │ e4d13458163d6b8314a9d976a55600ad │
├─────────────────────┼───────────────────────────────────────────────────────────────────────────────────────────────────┤
│ Access Instructions │ Access your Jupyter notebook using the token above. Go to 'Network' tab to see the public URL. │
╰─────────────────────┴───────────────────────────────────────────────────────────────────────────────────────────────────╯
✓ Your demo is being created. You can check its status with:
phala cvms get app_ecc21474f89b47a8e33ecd4e53a0ed744fff4eb2
Congratulations! Your Jupyter Notebook is deployed! Let’s checkout the deployment and use the Jupyter Token to access our notebook. Go to the “Network” Tab:
Open in New Tab and enter the Jupyter Token generated for your Jupyter Notebook.
We are now inside the Jupyter Notebook!
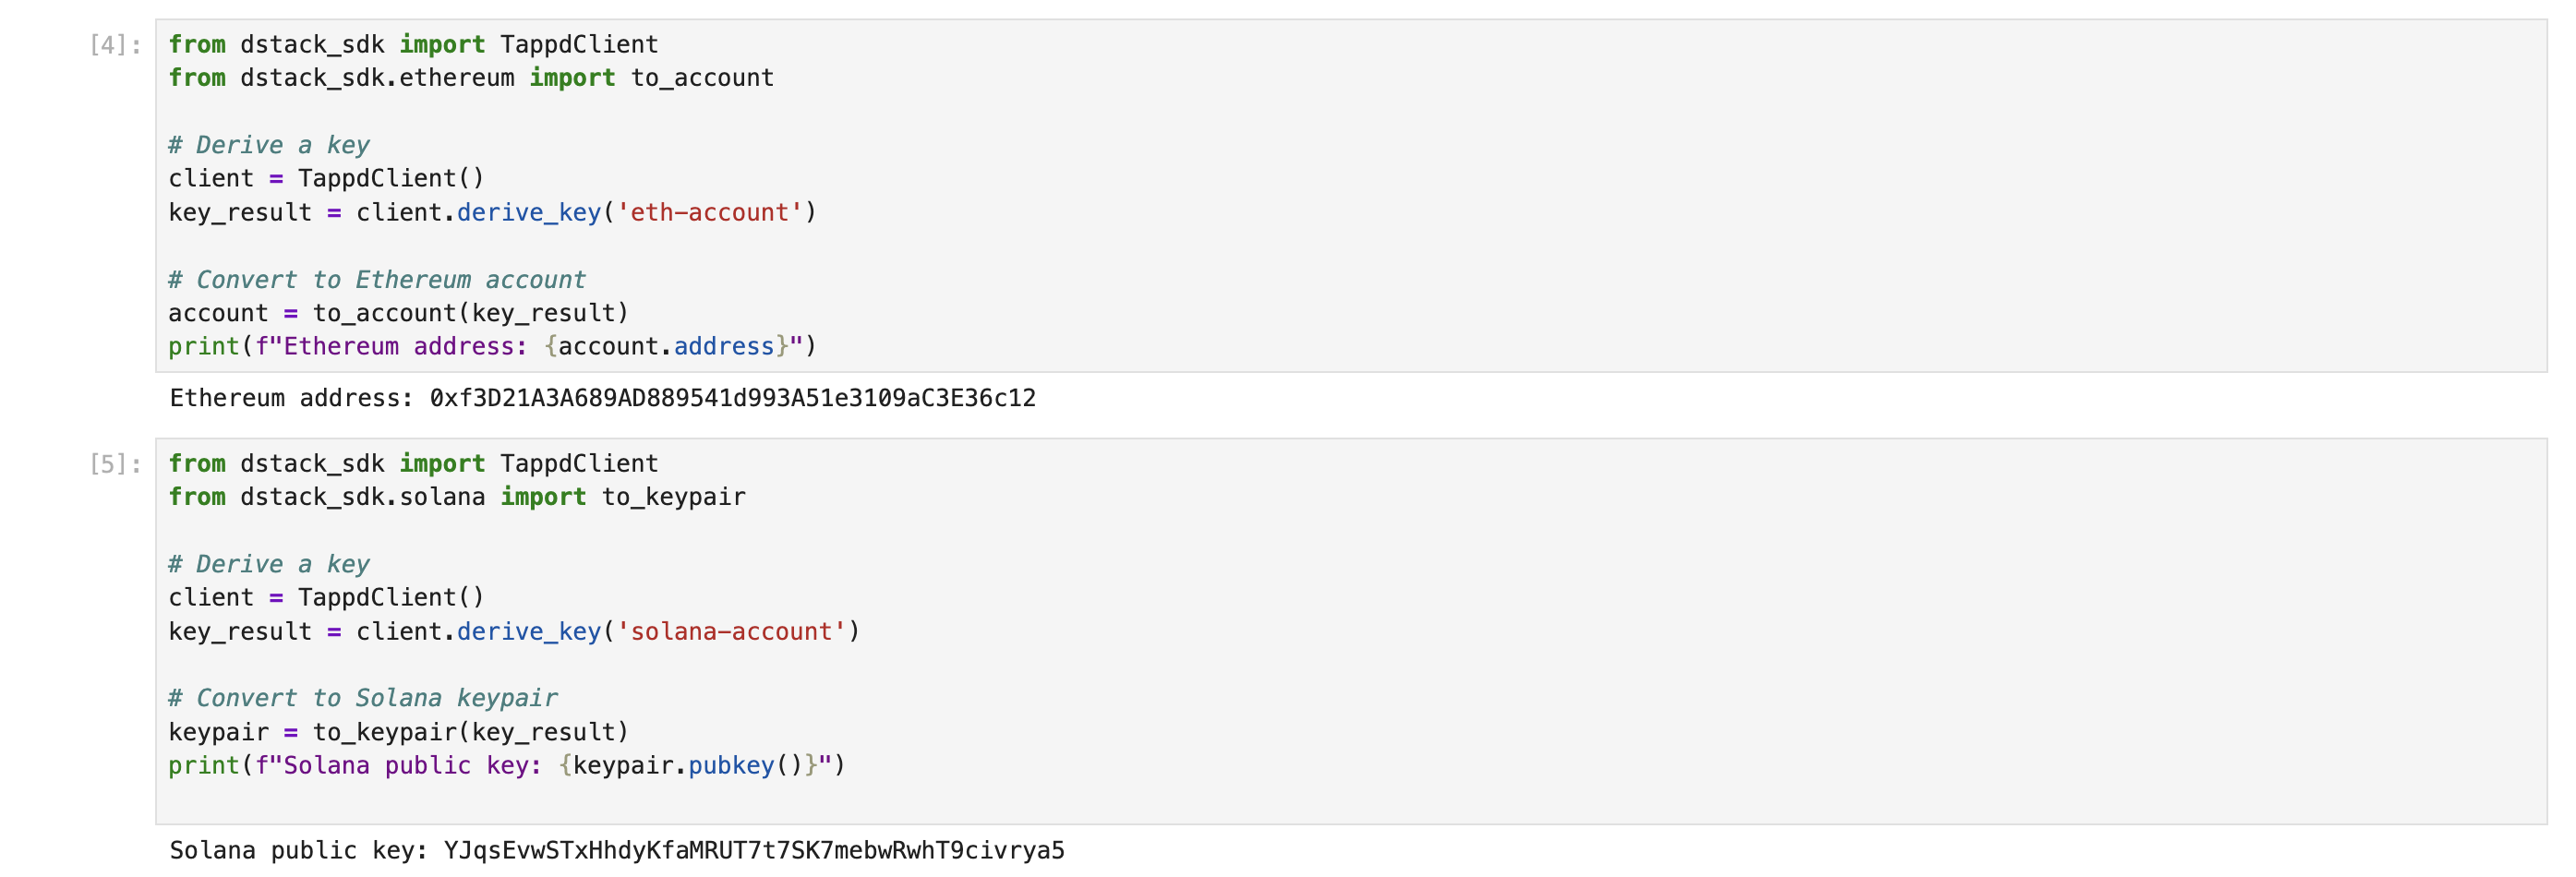
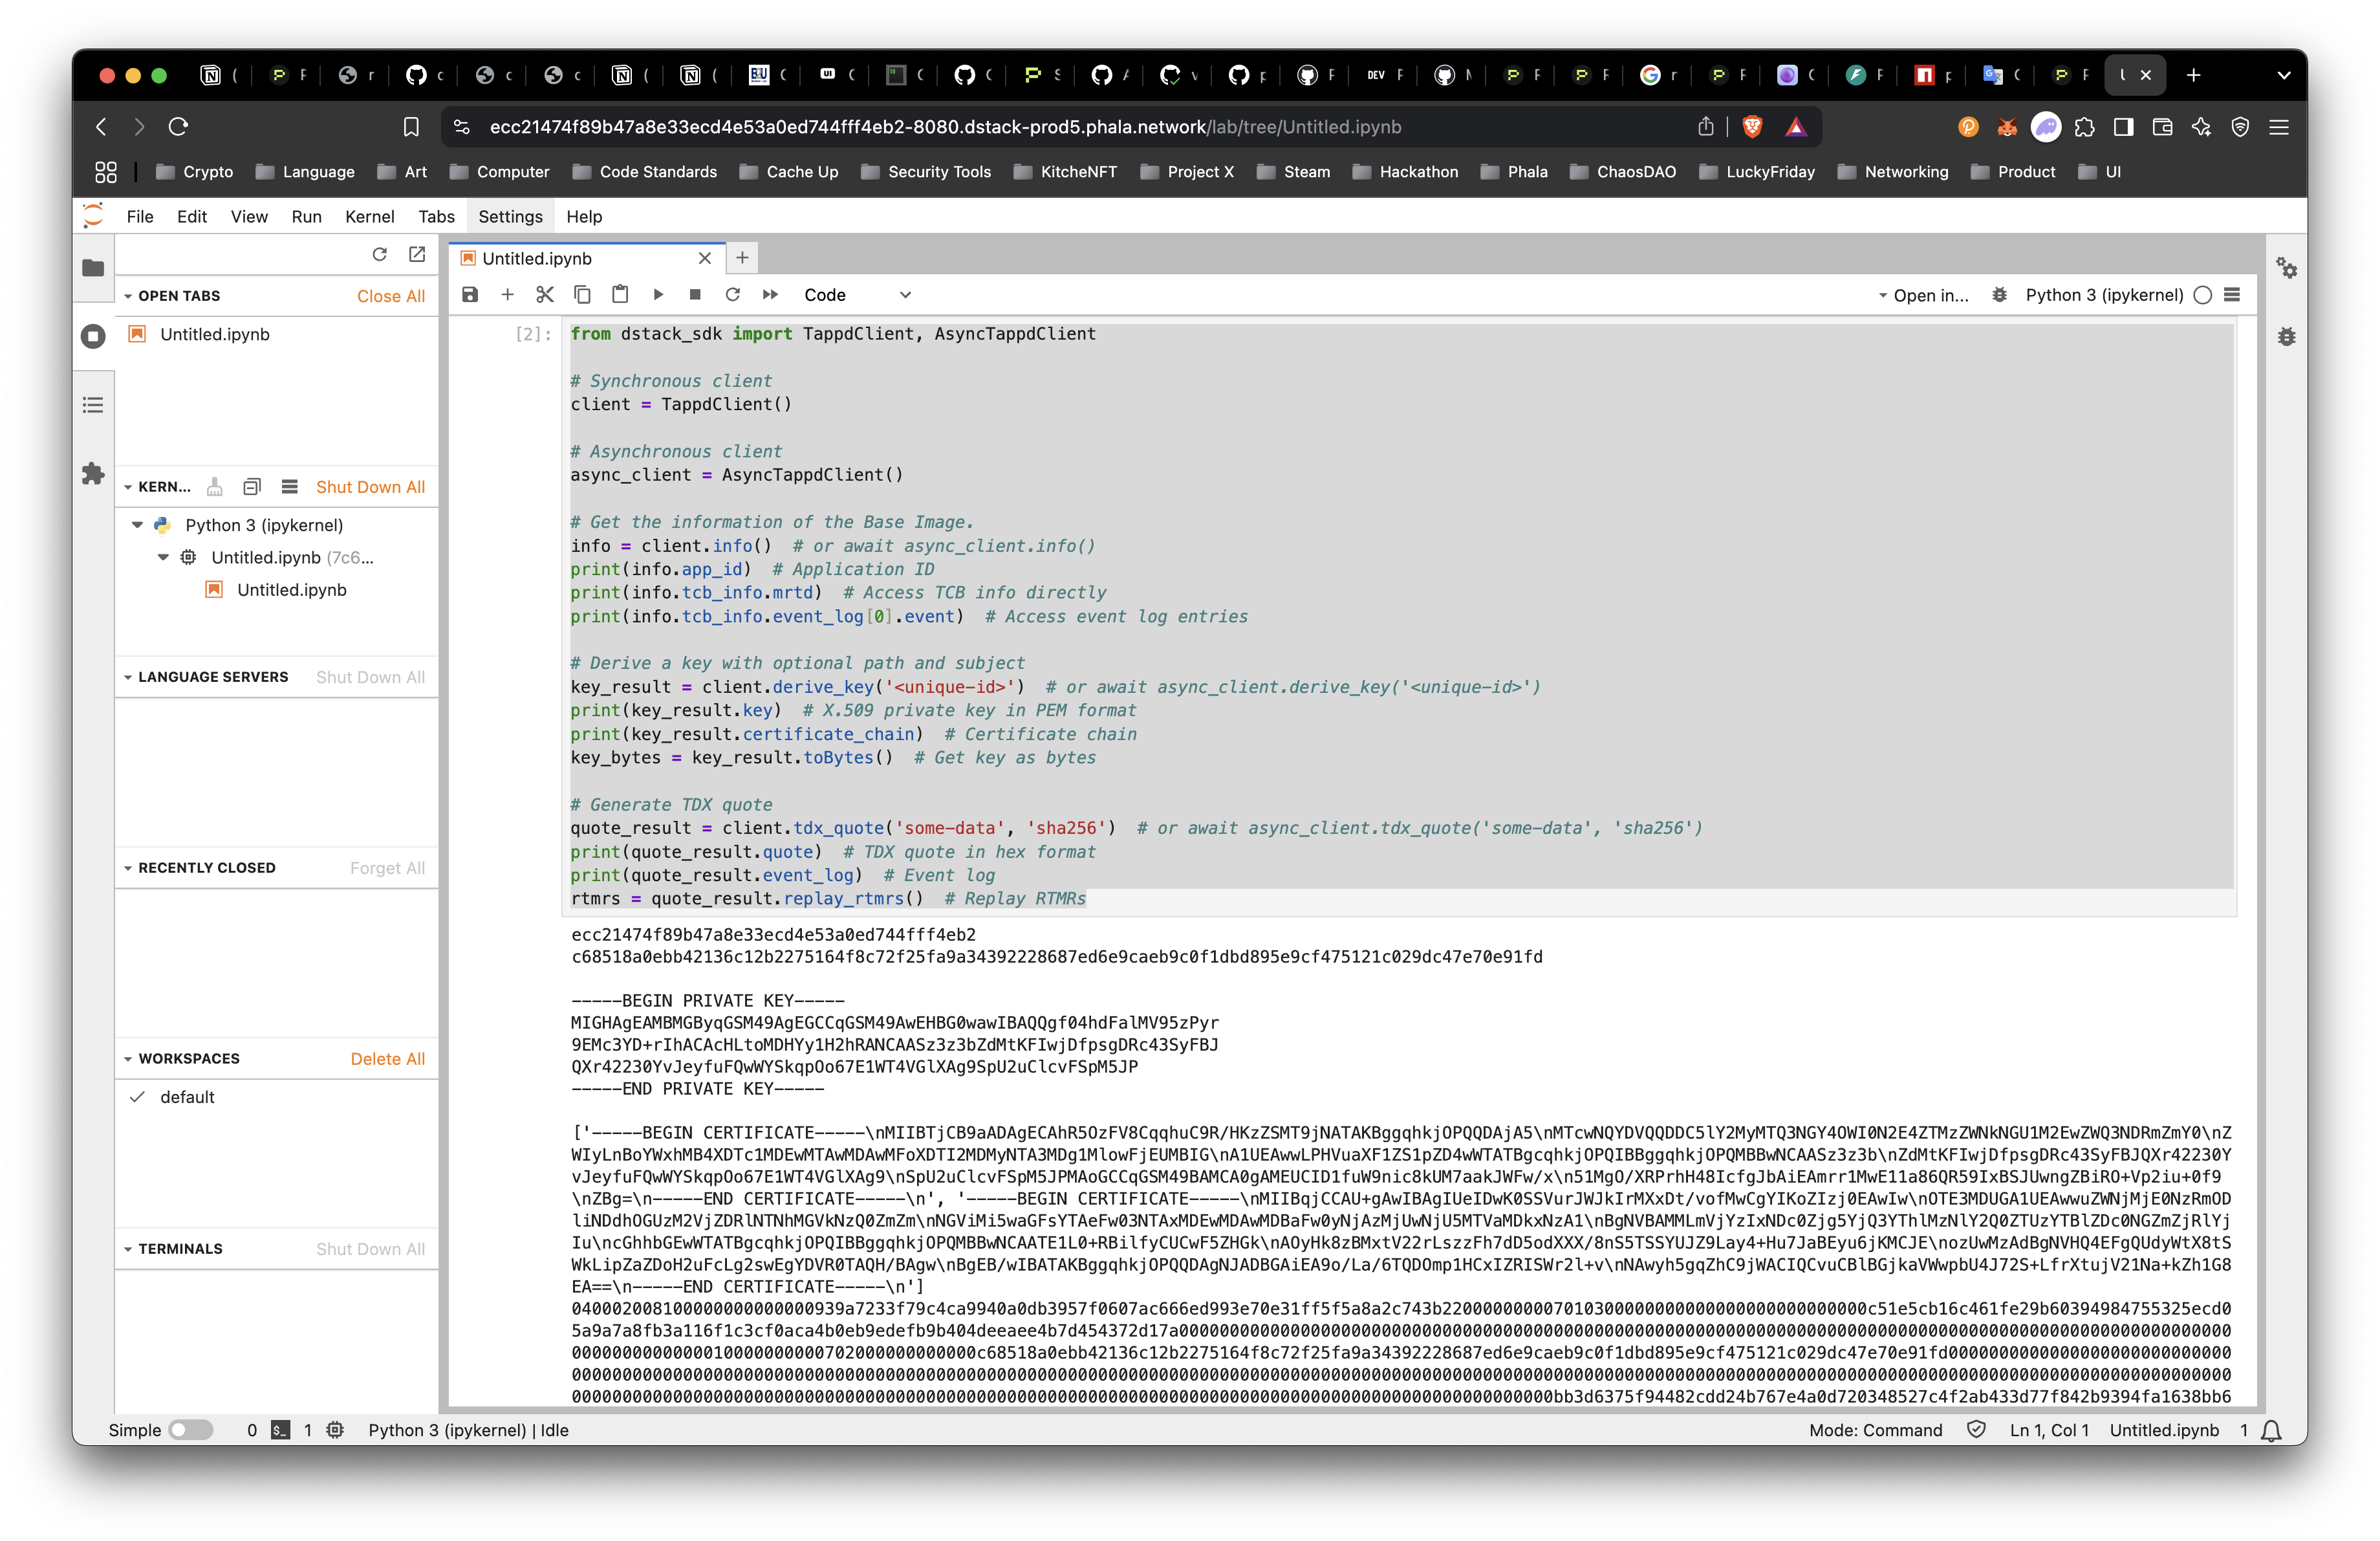
Call TEE Native Functions
Remote Attestation
Key Derive with Key Management Service
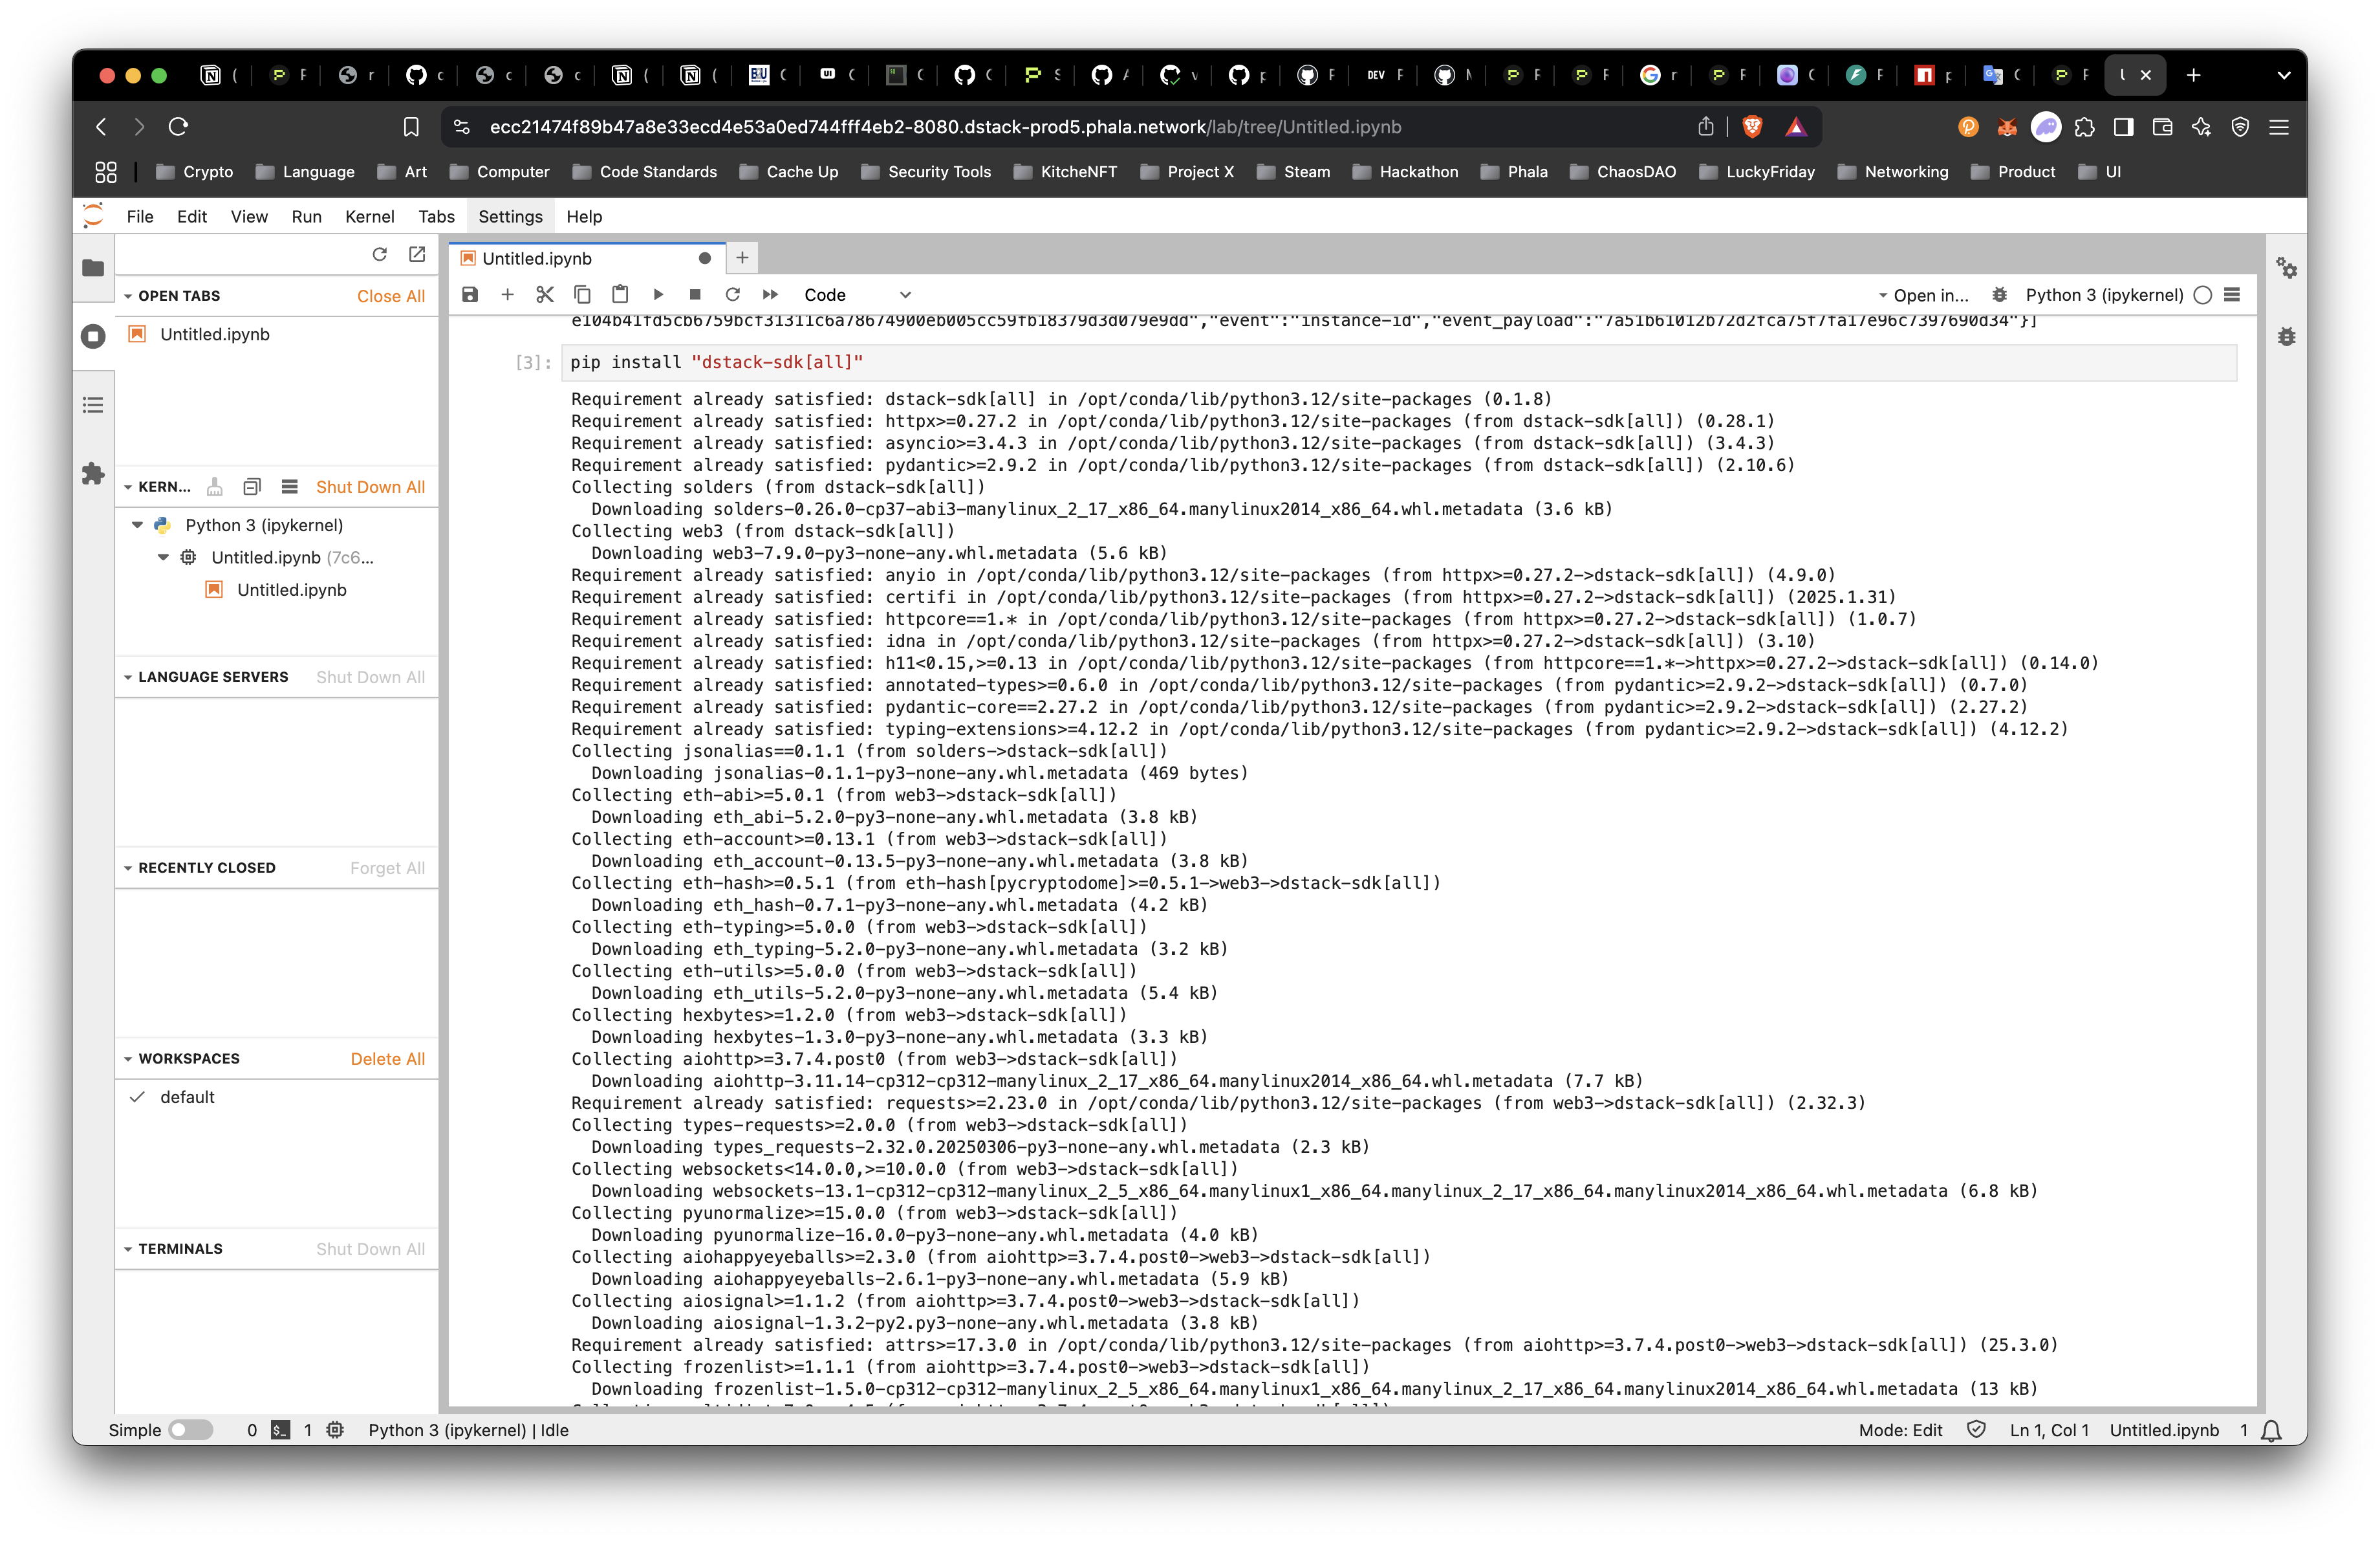
Install Dstack SDK
Now, we can use some sample code from the SDK README below to test out.
from dstack_sdk import TappdClient, AsyncTappdClient
# Synchronous client
client = TappdClient()
# Asynchronous client
async_client = AsyncTappdClient()
# Get the information of the Base Image.
info = client.info() # or await async_client.info()
print(info.app_id) # Application ID
print(info.tcb_info.mrtd) # Access TCB info directly
print(info.tcb_info.event_log[0].event) # Access event log entries
# Derive a key with optional path and subject
key_result = client.derive_key('<unique-id>') # or await async_client.derive_key('<unique-id>')
print(key_result.key) # X.509 private key in PEM format
print(key_result.certificate_chain) # Certificate chain
key_bytes = key_result.toBytes() # Get key as bytes
# Generate TDX quote
quote_result = client.tdx_quote('some-data', 'sha256') # or await async_client.tdx_quote('some-data', 'sha256')
print(quote_result.quote) # TDX quote in hex format
print(quote_result.event_log) # Event log
rtmrs = quote_result.replay_rtmrs() # Replay RTMRs
We get the following result:
Generate a Wallet on Ethereum and Solana
This is a great start, but let’s try something more specific like generating:
Ethereum Account
Solana Keypair
First, run pip install "dstack-sdk[all]" to get the right dependencies.
Let’s write some code to get an ETH and SOL account.
Conclusion
Congratulations! You have deployed your first CVM into the Phala Cloud. Let's dive into some of the templates we have.
Let’s try a couple function to test with the :
This is great! We have now shown we can interact with the TEE special functions for deriving keys through the key management service and generate remote attestations. We will have another blogpost to dive deeper into this information later, but to get a head start check out and the .